Making a Hook for a Hooktool
The challenge in making a hook for a hook tool is to realize that forging it is not really all that hard and it can be fun.
While I had written an article for "More Woodturning" a while ago on hook tools, I had not taken any pictures at the time. Hopefully these will help you in your efforts to make your own. A handle and a shaft are prepared in the usual way. See instructions on Oland tools for hints. A 3/16" hole is generally needed for the hook
These pictures were taken because I needed a hook to use at the bottom of a 9" diameter, 7" deep flower pot turned end grain. I was having difficulty getting the inside bottom cut square across as well as having trouble with the transition from bottom to side.
A hook is fun to use but takes a fair bit of practice. It is like using a bowl gouge on a spindle with the bevel rubbing but no tool rest. The rest is way out away from the cutting surface and at close to right angles with it. The shavings just fly. When the shavings curl off and you hear a "swish" you know you have it right. On the other hand, it is a good idea to make hooks in small batches. Catches can be spectacular and can bend a 3/16" piece of steel.

Here in the middle of the messy shop are the items needed for making the hook. This is simple black smithing. Do not let it phase you. It is one of the earliest trades mentioned in the Bible. People have done this for a long time. You can too. I have here a torch in a holder for safety's sake. The holder has a tenon on the bottom which is held in the jaws of the horse. The torch has a brazing tip but a regular propane tip is fine, it just takes a tad longer. On the fire brick at right is a vise grip holding an annealed masonry nail and a sparker for lighting the torch. A hammer is on the left.
A word about the metal used. I use 2" masonry nails because they are a cheap and easy source of high carbon tool steel. They come hardened and need to be annealed. Just heat them to red hot with the torch and rest them to cool slowly. That is it. Done. I use a fire brick to rest them on to cool but any fire proof surface will work.

This is a standard 5" mechanic's vise with a piece of 3/16" rod held in the jaws; more on that later. The flat part at the back is called an anvil and that is exactly what we will use it for.

Holding the point of the nail in the vise grips, heat the head and shaft red hot, hold it on the anvil and hit it with the hammer. Continue to turn and hit it, heating it as necessary to form it to the shape of the nail on the right. The head was not cut off. It is faster to heat and hammer it flat.


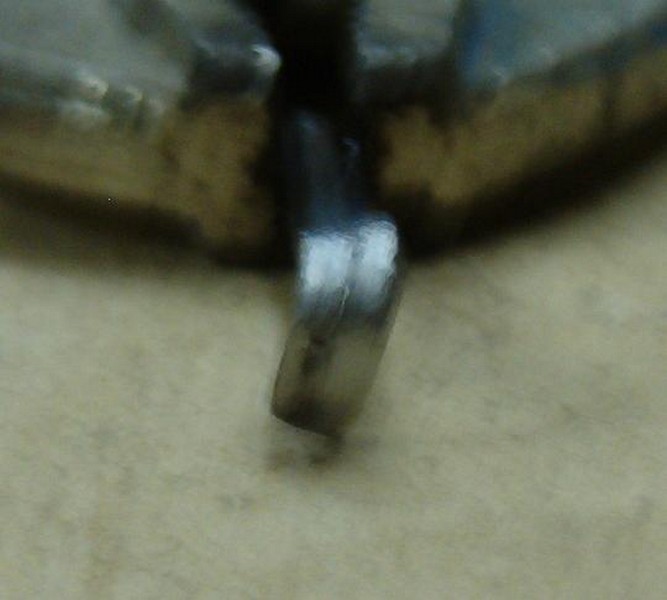
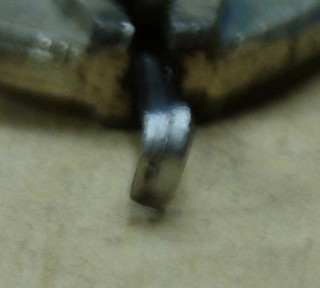
Now to the grinder. I want a hook with an inside bevel for the particular cuts I am about to make. An outside bevel is usual and the one I use the most. As you look at the nail with edge up ward, for an outside bevel grind it on the left, for an inside grind it on the right. Here it is ground on the right. I first grind the edges straight, then the sides flat, then the bevel to about 45 degrees.

Now, about that steel rod upright in the vise. Incidentally, a nail about 3/16" in diameter will do as well. Do not have the head above the vise, just a clear, unobstructed shaft. Heat the flat end of the hook to be in the torch to red hot and use a pair of pliers to bend it around the steel rod.

Give it another heat just behind the hook and bend it with the pliers to a little less than 90 degrees.

The hook has to be hardened and tempered before use. Heat it red now and plunge it immediately into a bucket of water. Use at least a gallon. This hardens the steel but makes it brittle so it needs to be tempered. Incidentally, I have changed to a regular torch head and a tank that is almost out of fuel. I find a light flame easier to use when tempering such a small piece of steel.

Now for the tricky part, tempering the steel. This is not hard, just tricky and if you blow it, just reheat to red and plunge it into the water and start again. First, you need to see the steel well. Grind or sand it to shiny. I use a 3/16" chain saw sharpening stone in a Dremel. It is also what I use to sharpen the hook as I use it in turning.


This is a bit of a dance. Take your time. Touch the hook to the flame and remove it. Look at the hook. Steel oxidizes quickly in the presence of heat. If you have seen a tool blue when grinding, that is oxidation. We do not want to get to blue but to straw. Touch and look, touch and look. As soon as the hook turns straw, plunge it into the water and swirl it around. Look at it. If it looks straw or bronze, great. If not, heat to red, quench in the water, polish and try again. No harm done.

It remains to cut the shaft to about 3/4" long and insert it into the shaft. I used a set of bolt cutters but whatever works is good.

It is the one on the left. Incidentally, it did the cuts I needed, but I still prefer an outer bevel for most hook work.
Now that you made one try it out like this.